July 17, 2017

CAS Birthday Card: Make A Wish and Blow Your Candles ft. Winnie & Walter


Hello crafty friends! I was inspired by a few challenges so I decided to make a simple birthday card. CAS and easy to make!


I stamped the candle image from Winnie & Walter's Happy Birthday to You set repeatedly with VersaMagic dew drop inks. This is actually a CASE of Lydia's card. Next I stamped the sentiment from the Sentimental: Birthday set with Hero Arts Unicorn white ink. To add some interest to this one layer card, I embossed "21" with the number dies from the Typecast: Cary Numbers Cutaways, and that completes this CAS card!

Challenges Entered:
    
CASology: Wish / AAA Cards: One Layer + Colored Cardbase /  Joy Clair: ATG

   
Less is More: One Layer + Colored Cardbase / Paru's Card Making Challengs: Birthday / La Pareja Creativa: CAS

  
7 Kids: ATG I used Mini Misti Stamping Tool / Winnie & Walter: July Color Combo

July 15, 2017

Winnie & Walter July Leading Lady ft. Typecast: Cary


EDIT: Top 3 at Dies R Us


Good morning crafty friends! I'm back with some more Leading Lady projects. This week I decided to focus on a favorite product of mine: the Typecast: Cary stamp set. 

I needed to make some cards for my cousins, Sarah and Sophia, to thank them for planning our New York trip last month. And I wanted to customize them to make these thank you cards extra special... Did you see what I did? Yes! I spelled out their names with the Typecast: Cary alphabets and stamped them with VersaMark ink to create a personalized background. It's fairly subtle but I hope it'll put a smile on their faces when they notice it. :) 


For the focal point of the card, I used the In a Word: Thanks Cutaway (I think the font matches so nicely with the Typecast: Cary set!) and die cut it from lime green glitter cardstock and white cardstock. Next I layered them together and mounted them with foam. Then I stamped the small "MANY" (from Sentimental: Birthday set) on a tiny banner and adhered it to the card with foam tape. I embellished the card with silver thread and some enamel dots and that finishes off the card!

  
For Sophia's card, I used the From the Bottom of My Heart stamp set. I tried embossing it with Ranger's Enchanted Gold embossing powder but for some reason I didn't get good coverage even with two layers of embossing. (left photo) So I tried stamping with Hero Arts Soft Vanilla shadow ink first before embossing, and got a much better result. (right photo)


I also embellished this card with silver thread and enamel dots to complete the design. I really love how versatile these alphabet stamps are; you can also stamp "THANK YOU" for the background and I think it'll be fun to stamp "XMAS" or "XOXO" for other occasions cards. Really, the sky is the limit! I really enjoyed creating these cards, and I hope you liked them, too. 

Giveaway: 
Thank you so much for leaving your sweet and kind comments on last week's posts. They make my heart sing <3
**
Shay has generously provided me with a $30 gift certificate that I can giveaway. If you enjoyed these cards, please comment on both W&W and my blog for a chance to win! I will be posting for the remaining Saturdays of this month, so if you comment on each post you will have 4 chances to win this wonderful prize. That is all from me today. I hope you will join me next Saturday but until then, have a wonderful week!


Challenges Entered:
   

July 8, 2017

Winnie & Walter July Leading Lady: Background Building

Hello there! My name is Jessica and I am so honored to be Winnie & Walter's July Leading Lady. I've been in love with Winnie & Walter's designs since I discovered them last year. So I can't wait to share with you what I created with these amazing products. I made two cards for today's post, and they both focus on background building. Here's my first card:

EDIT: Winner at Happy Little Stampers


I decided to use Kindness with Evelin T. Designs to create a forest background for my first project. I started off by cutting three masks for the trees (left photo), then I stamped one of the smaller trees with VersaFine Onyx Black ink and heat embossed it with clear embossing powder. Next I masked the smaller tree and stamped the two larger tree images (right photo). I then covered these images with the other two masks and continued stamping until I have covered the entire card front. 

After watercoloring all of the tree images with ZIG clean color real brush pens, I stamped the bunny image from the new Party On with Evelin T. Designs, die cut it with the coordinating dies and watercolored it as well. 

I decided to keep the sentiment pretty simple. I stamped and heat embossed "thinking of you" from Sketchy Thoughts on a piece of vellum and that completes the card! 

For my second card I decided to stretch my dies and use them creatively to create a small town scene. I used the two smaller dies from Essentials: Lana Cutaways (shown below, right photo) to make the houses. This die set is my favorite product from the January/February 2017 release, and I love the postage stamp design. But I wasn't sure how I'm going to use the smaller ticket dies until I have thought about making this project. I think dies are really so versatile and I really enjoy challenging myself to use them in different ways. 

  
I wanted to create an organic watercolor look for my houses, so I used the ink smooshing technique. The Distress inks I used are listed below:  
(left: lightest shade. right: darkest shade)
Blues: Peacock Feathers, Salty Ocean, Blueprint Sketch, Faded Jeans
Greens: Twisted Citron, Mowed Lawn, Pine Needle 
Yellows: Squeezed Lemonade, Mustard Seed, Wild Honey
Oranges: Spiced Marmalade, Carved Pumpkin
Reds: Abandoned Coral, Candid Apple, Fired Brick


Then I die cut them out and drew some doors and windows with 0.35 Copic Multiliner. I also stamped and heat embossed the adorable bears from the Big Hugs from Evelin T. Design set. After watercoloring the image with ZIG clean color real brush pens, I die cut it with the coordinating Big Hugs with Evelin T. Design Cutaways. 


I mounted some of the houses with foam tape to create some dimension to the scene. It really does make a big difference!


For the sentiment, I chose the "welcome little one" stamp from Sketchy Thoughts and heat embossed the image with silver embossing powder. I also added some pierced dots details to the sentiment banner by using the small border die from Essentials: Lana Cutaways. I then embellished the card with some rhinestones and turquoise sequins and that finishes off the card. 

Giveaway: 
Shay has generously provided me with a $30 gift certificate that I can giveaway. If you enjoyed these cards, please comment on both W&W and my blog for a chance to win! I will be posting for the remaining Saturdays of this month, so if you comment on each post you will have 4 chances to win this wonderful prize. That is all from me today. I hope you will join me next Saturday but until then, have a wonderful week!


Challenges Entered: 
   
Seven Hills Crafts: Sketch (I did a loose interpretation of the sketch for my second bear baby card. The houses are the background, the vellum banner and sequin string are the two strips, and the bear image is the circular object.) / 7Kids: ATG (I used Tim Holtz Distress Watercolor Cardstock and Distress Ink Kit 1 / Kit 2) / Word Art Wednesday: ATG


Winnie & Walter: Rerun No. 21 / Happy Little Stampers: Watercolor

  
Happy Little Stampers: ATG with Dies /  Joy Clair: ATG

June 30, 2017

Winnie & Walter June 2017 Release Premiere Day #4


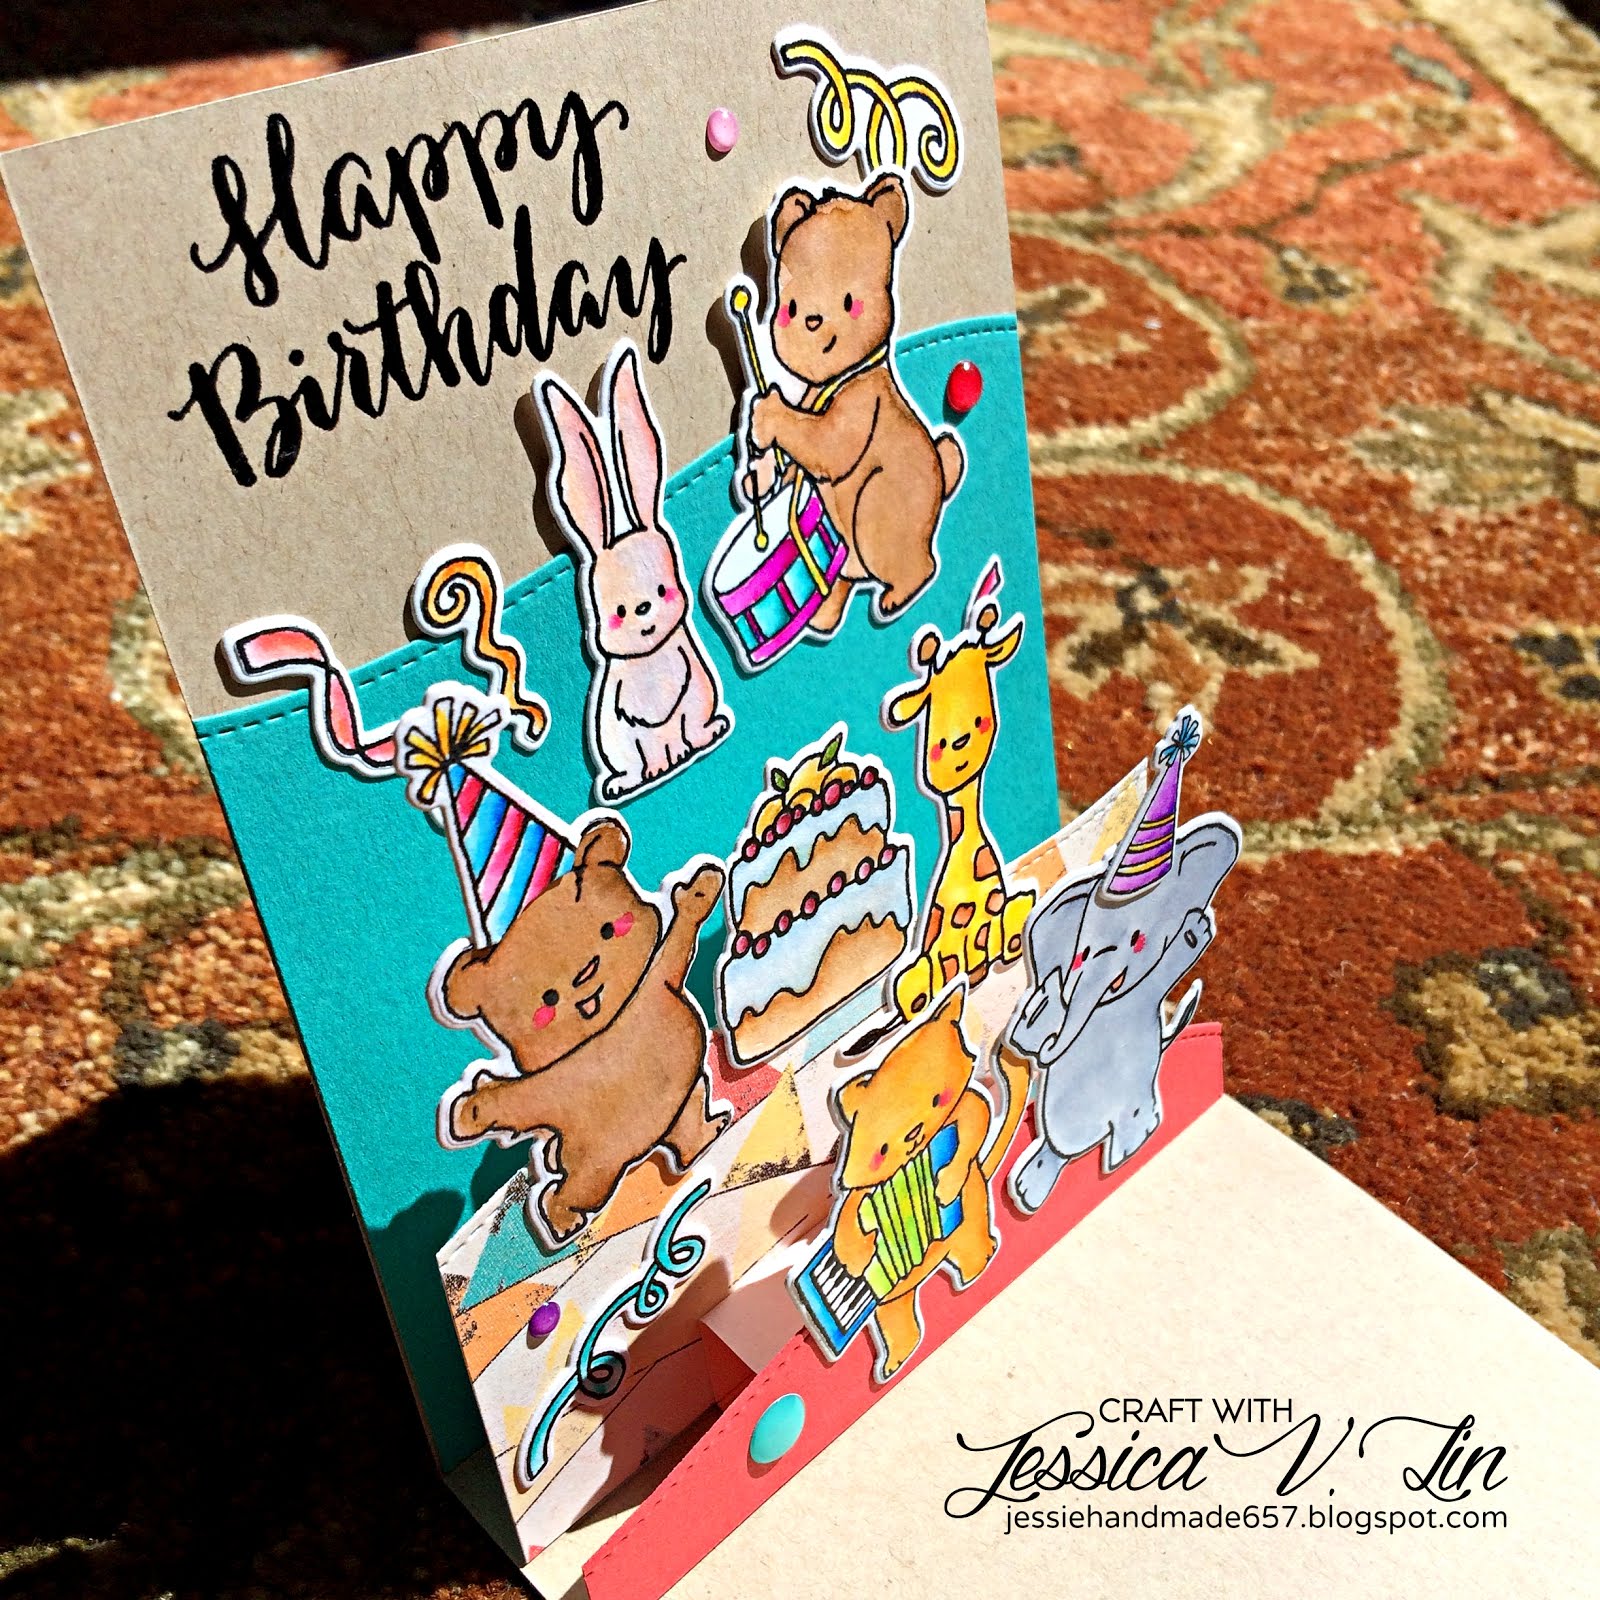
Hello and welcome! Today is Day 4, and the last day of our showcase for the June release. We are featuring another amazing and adorable stamp set: Happy Dance with Evelin T Designs (+ coordinating dies). I decided to combine this set with several images from Party On with Evelin T Designs and Welcome to the Family with Evelin T Designs to create a party scene. 


Since I am including so many critters, I decided to make a 3D pop up card so I don't have to layer the images directly on top of each other. This design also adds a lot of dramatic dimension to the card. (Which I just LOVE <3) Even though this is my first time making a pop up card, it really wasn't that hard and the result is totally worth the time and effort. :)


The layers of cardstock and die cut images did turn this into a bulkier card, so I created a belly band with this fun balloon image. The sentiment I white heat embossed is from Sentimental: Birthday, another a new set from this release and a must-have for all crafters! (Because who doesn't need a versatile birthday sentiment set like this one?!?)


I really enjoyed creating this card and I hope you liked it, too! Thanks so much for stopping by, and I hope I'll see you again soon. 

Challenges Entered: 
  
SSS Wednesday: ATG / Word Art Wednesday: ATG / Little Miss Muffet: ATG

  
7Kids: ATG (I used Tim Holtz Distress Watercolor Cardstock) / Paru's Card Making Challengs: Birthday

Powered by Blogger.