December 9, 2016

Winter Coffee Lovers Bloghop ft. STAMPlorations


Hello! Today I'm sharing a card I made for the Winter Coffee Lovers Bloghop. This card features Coffee for All Seasons, which is one of the new coffee stamp sets from STAMPlorations. It's also my favorite out of the entire release! Check out all of the coffee/tea stamps we have here!


I decided to keep this card rather simple by keeping the focus on the winter image. I colored it with the Copic Markers listed below: 
Cup: C1, C3, C5 (Cool Gray)
Coffee: YR24 Pale Sepia, E33 Sand
Background: E29 Burnt Umber, E09 Burnt Sienna, R37 Carmine
I think all fours images are so lovely and the coloring process is really therapeutic. I'm thinking about stamping and coloring them on some gift card holders (for Starbucks gift cards) and giving them as Christmas gifts. Anyways, I hope you have enjoyed looking at my creation, and thanks so much for stopping by! 

Challenges Entered: 

Winter Coffee Lovers Bloghop / STAMPlorations: ATG

December 6, 2016

There's Always Room for Dessert ft. Lawn Fawn


I'm guest designing over at CASology this week. CASology is one of my favorite challenge blogs of all time because it often has interesting and unique challenge themes. This time the theme is: SPACE. 


You could interpret it as outer space and incorporate galaxy, stars, or moon into your card. I, however, don't have these sort of stamps on hand so I thought about other ways of describing space. I almost went with the idea of stamping a heart and pairing it with a sentiment like: There's no space in my heart except those for you. I don't know... does that even make sense? I thought the card would look too simple and I wasn't too thrilled with the idea. Then suddenly I saw this stamp set and thought about our dessert stomachs. And voila! Here's my card. :)


The three ice cream images are from Lawn Fawn's Here's a Scoop set, and the cake is from a mini set called Year Three. I colored all of the images with Copic Markers. The colors all look pretty realistic, don't they? Maybe not my matcha cake...But at least I tried :P

To make the glass and cup even more realistic, I've coated them with glossy accents. Then I decided to add some wink of stella shimmer to my desserts. I finished off the card by handwriting my sentiment. I really like how this card turned out and I hope you've enjoyed looking at my creation. Thanks for stopping by and have a nice day!

Challenges Entered:

MFT Color Challenge #58

December 2, 2016

Stamping with Distress Inks ft. STAMPlorations


Hello! I'm back again with another card I guest designed for STAMPloration's Theme & Sketch challenge. This month I decided to go with the sketch (shown below).


I'm using the Trendy Leaves set I recently purchased from STAMPlorations and I'm stamping them with distress inks. Before I stamp each image I sprayed the stamp with my perfect pearls mist to give that loose watercolored look. For the Thanksgiving themed card I used Seedless Preserves, Fossilized Amber and Spiced Marmalade. For the Christmas themed one I used Fired Brick and Peeled Paint.


Then I heat embossed the sentiments from STAMPloration's Fond Expressions 2 set. This technique is quick and easy and it works on pretty much all solid stamps. I hope my cards have given you some inspiration and I hope to see you link up at the challenge!

Challenges Entered:

MFT Color Challenge #58

SSS Wednesday: ATG / STAMPlorations: ATG

November 30, 2016

Embellished Christmas Tree ft. Hero Arts


EDIT: Top 3 at a2zScrapbook

Since it's finals week next week, I didn't make many cards during the holidays except for the ones I guest designed for. However I really wanted to enter a2z Scrapbook's challenge because this month's theme is "Embellish it", and I love adding embellishments to my cards. I decided to make the embellishments the focal point so I picked Hero Art's Merry Christmas Tree stamp and die set. 


I used a good amount of pearls, gems, sequins and stamped die cuts to decorate this christmas tree. The gems are originally clear (like the ones on the right side of the photo), but I colored some with my Copic marker (R37 Carmine) to match the red color scheme.


I also added a coat of glossy accent to all of the stamped die cuts so they would look like embellishments, too. Then I mounted them on foam squares and adhered them to the tree. 


I also embossed the white card base for some additional interest. It looks more dimensional in real life, I just can't capture the details in the photos. 

I just received the SHOTBOX today and this is the first card I photographed inside this light box. To be honest I'm a little disappointed with the results; the lighting environment isn't what I've expected and I still have to tweak the photos afterwards. I think the lights is a little too sharp and cool and I was looking for the effect of warm, natural light. Maybe I just need to practice using it more and figure out the right way...If you have any experience with light boxes or would like to share how you photograph your projects, please comment below. I would really appreciate it! And thanks so much for stopping by!

Challenges Entered:

a2z Scrapbook: Embellish It / SSS Wednesday: ATG / SSS Monday: O' Christmas Tree

MFT Color Challenge #58

November 28, 2016

Fall Leaves Card ft. STAMPlorations


I hope you all are having a wonderful Thanksgiving. :) Today I'm sharing a quick thankful card I made with STAMPloration's Trendy Leaves set. The color scheme and leaves images are inspired by CUTploration's challenge graphic (shown below).


I don't usually stamp with distress inks, but today I thought I would try the misting technique to create this watercolored look. I stamped each leaf image with Seedless Preserves and Spiced Marmalade/Fossilized Amber, then sprayed the stamp with perfect pearls mist and finally stamped it on watercolor cardstock. I love how quick and easy it is and the result is quite stunning. Hope you have enjoyed this card, and thanks for stopping by!

Challenges Entered:
Cas-ual Fridays: Be Thankful / STAMPlorations: Giving Thanks / Cards in Envy: Thank You

STAMPlorations: CUTplorations (I used Mama Elephant's Ocean Wave Trio Die to create the curvy edge of the purple panel) / STAMPlorations: ATG

November 27, 2016

Christmas Alpaca Card ft. Lawn Fawn


EDIT: Winner at CASology / Honorable Mention at ATSM

It's almost December! I can't wait for Christmas to come.  :) Today I'm sharing a card I guest designed for Marker Pop's color challenge. I don't usually make cards with colored card bases, but I decided to use all the colors in the color scheme and I happen to have this mossy green cardstock on hand. 


I originally wanted to use the snow marker I bought recently to create the fur texture, but it didn't puff up the way it should. I'm guessing it's because I have an older heat gun and its temperature setting is too high. So instead of getting a puffy texture I got an overcooked mess. (I've tried heat setting the liquid before and after it dried, and even applying heat from the back of the paper. None of the methods work unfortunately.) 

At this point I've given up using the snow marker. I still wanted to add some fur to my alpaca, and I thought about adding cotton. I don't have cotton balls in my house and I'm kinda reluctant to buy a big pack just for this small project, so I begin to search for substitutes. And yes, my solution is Q-tips!


I pulled off cotton from 1 Q-tip and dabbed some color on with my Copic marker (E33 Sand). I then mixed/transferred the color to other white areas by tearing the cotton ball repetitively. I love how it turned out; the color variation definitely makes the fur look more realistic and natural. Even though this method took a lot longer than just using the snow marker, you could add colors to the critter's fur and you don't have to worry about it being squashed in the mail. 


The Copic colors I've used are:

Scarf: R27, R37
Body: E33
Face: Y21
Blush: R02


I created a mask and applied Vintage Photo distress ink over it to create the ground. Then I drew some white dots as snow and applied 3 snowflake sequins to finish off the card.


I've also created a CAS version as I want the focus to be solely on the alpaca. I hope you have enjoyed looking at my creation, and thanks so much for stopping by!

Challenges Entered:

CASology: Soft / Penny Black: ATG Christmas

ATSM: ATG / MFT Color Challenge #58

November 19, 2016

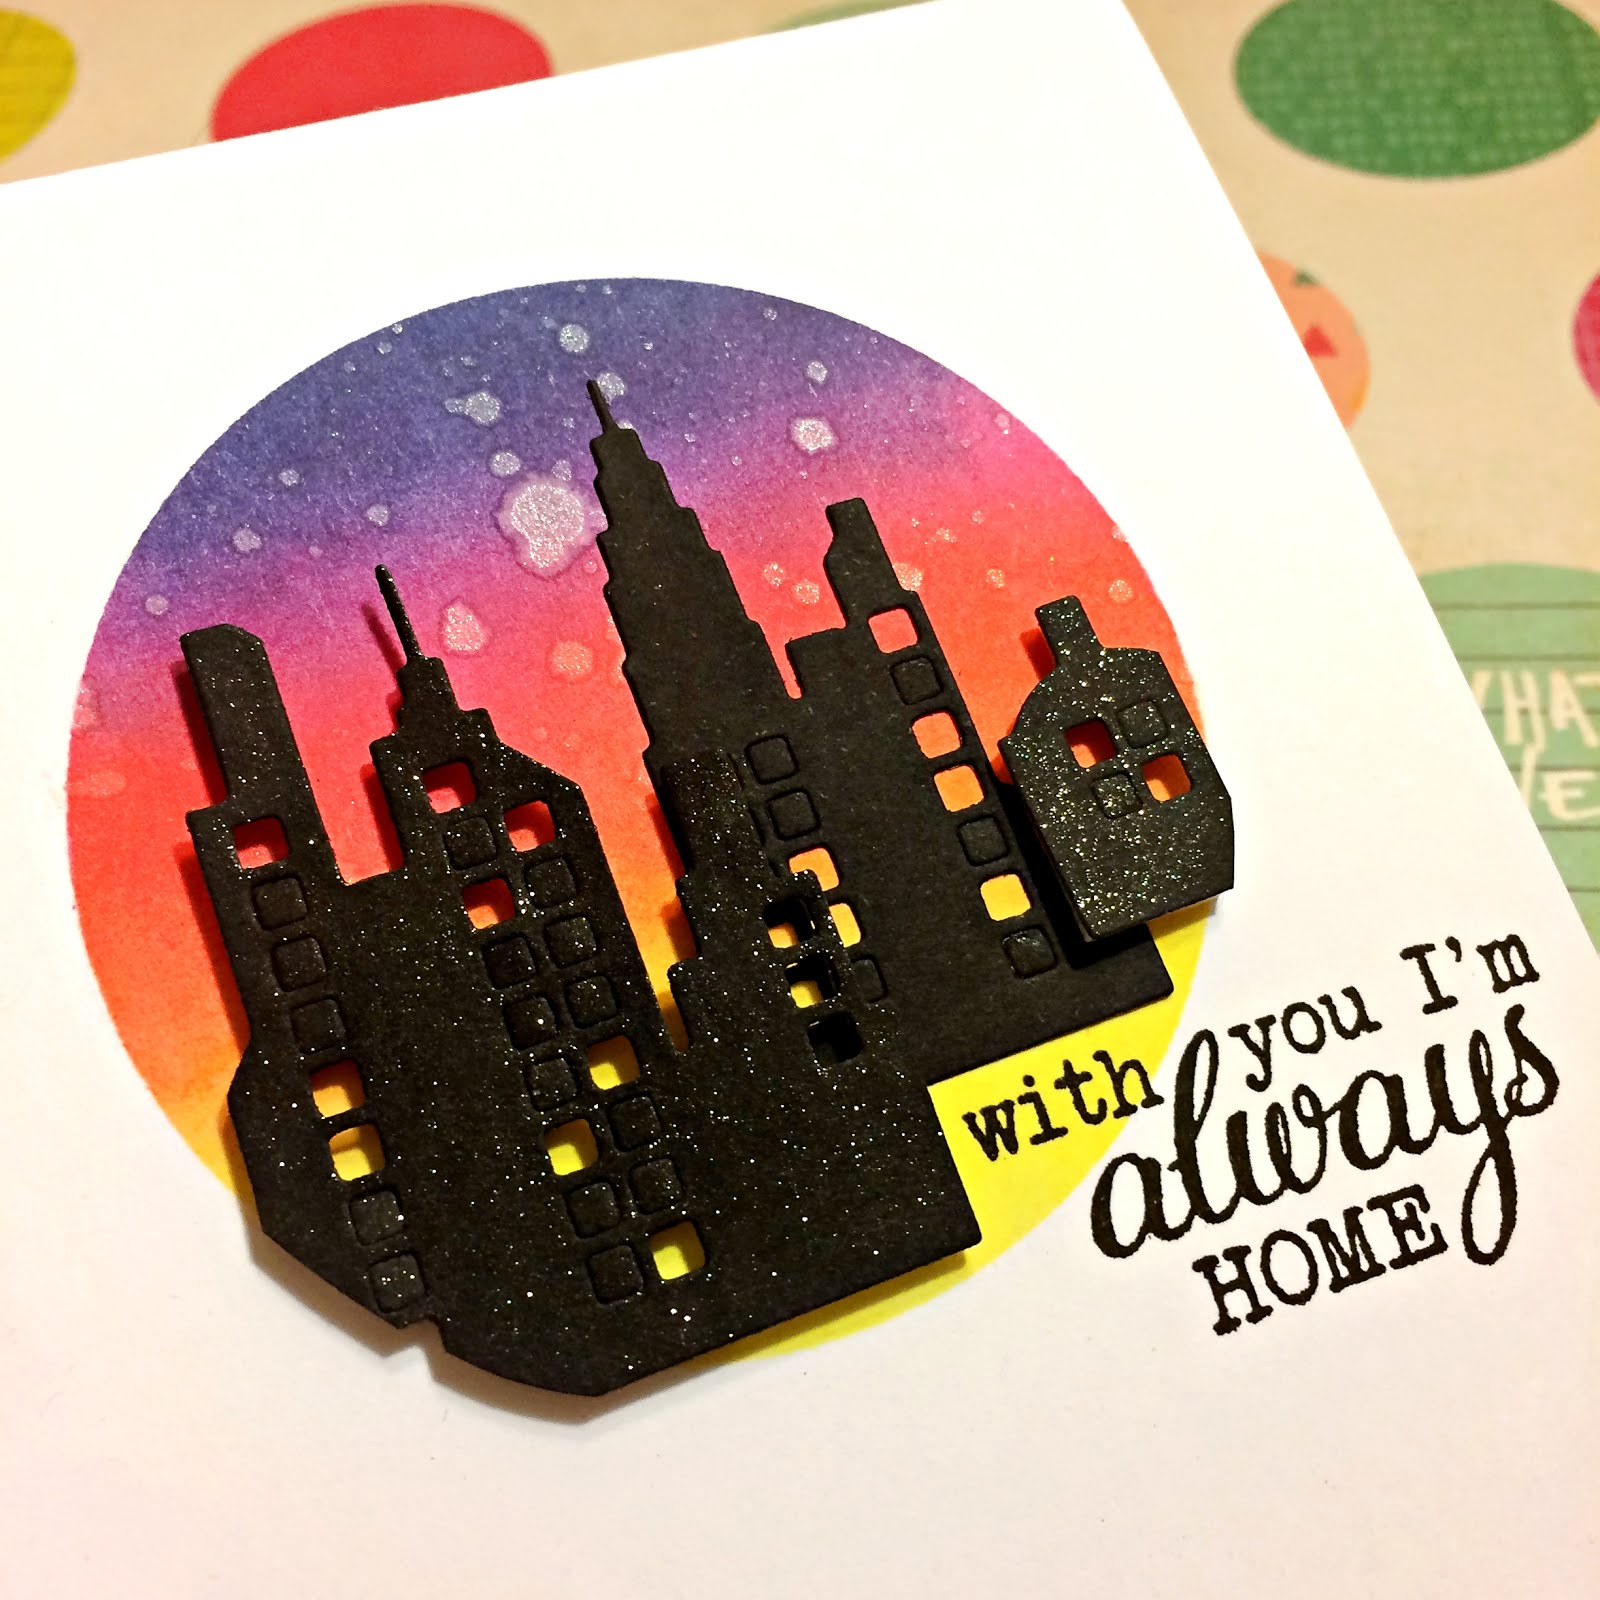
City Sunset Scene ft. Paper Smooches

Hello! I'm guest designing over at AAA Cards. The challenge theme for Game #78 is circles. I decided to use a circle mask and blended Chipped Sapphire, Picked Raspberry, Ripe Persimmon, and Squeezed Lemonade distress inks to create a sunset background. I've never tried using these colors to create a sunset scene before, but I think the bold, vibrant colors give a modern city vibe that match the die cuts quite nicely.

The building die cuts are from Paper Smooches' Super 2 Die. I actually cut the die cuts into 3 separate parts and arranged them differently to fit in my circle background. I've also decided to mount two of them on foam tape to create a subtle dimension, as well as add some sparkle with my wink of stella brush. The sentiment is from Sugar Pea's Wanderlust set. I hope my creation has given you a bit of inspiration, and thanks so much for stopping by. :)

Powered by Blogger.