Showing posts with label Christmas. Show all posts

July 22, 2017

Winnie & Walter July Leading Lady: Christmas in July


Hello and welcome! I am back with another Leading Lady project and I'm so excited to share this one with you! Most of the cards I send out are birthday and Christmas cards. Although I definitely send out more Christmas cards because I'm not that good at remembering other people's birthdays... (who else relies on Facebook reminders?!?) Anyways, I'm glad to start working on my Christmas card stash early this year. I really enjoyed creating this card, and I hope it will inspire you, too! 


I started off by creating the night sky background. I used the Essentials: Lana Cutaways to die cut the background panel from watercolor cardstock. Next I sponged and smooshed Stormy Sky, Evergreen Bough, Dusty Concord, Chipped Sapphire distress inks. I also added a touch of Black Soot to the borders for some contrast. To add more interest to the background, I spritzed some water droplets to create the faded look. Then I stenciled white embossing paste over the Scenery: Big Bang Circle Creative Screenings. I also applied a thin coat of embossing paste to bottom portion of the panel to keep my critters grounded, and that completes the falling snow scene. 


I then watercolored these adorable images from Season's Tweetings with Evelin T. Designs with ZIG clean color real brush markers, and die cut them out with their coordinating dies. 


Finally, I gold heat embossed "warm winter wishes" on vellum for the sentiment banner. I decided to add "sending you" from Sentimental: Love stamp set as well because I think it ties back to the postage stamp shaped background. #happymail :)


Giveaway: 
Shay has generously provided me with a $30 gift certificate that I can giveaway. If you enjoyed this card, please comment on both W&W and my blog for a chance to win! I will be posting for the remaining Saturdays of this month, so if you comment on each post you will have 4 chances to win this wonderful prize. That is all from me today. I hope you will join me next Saturday but until then, have a wonderful week!


Challenges Entered:
    

February 4, 2017

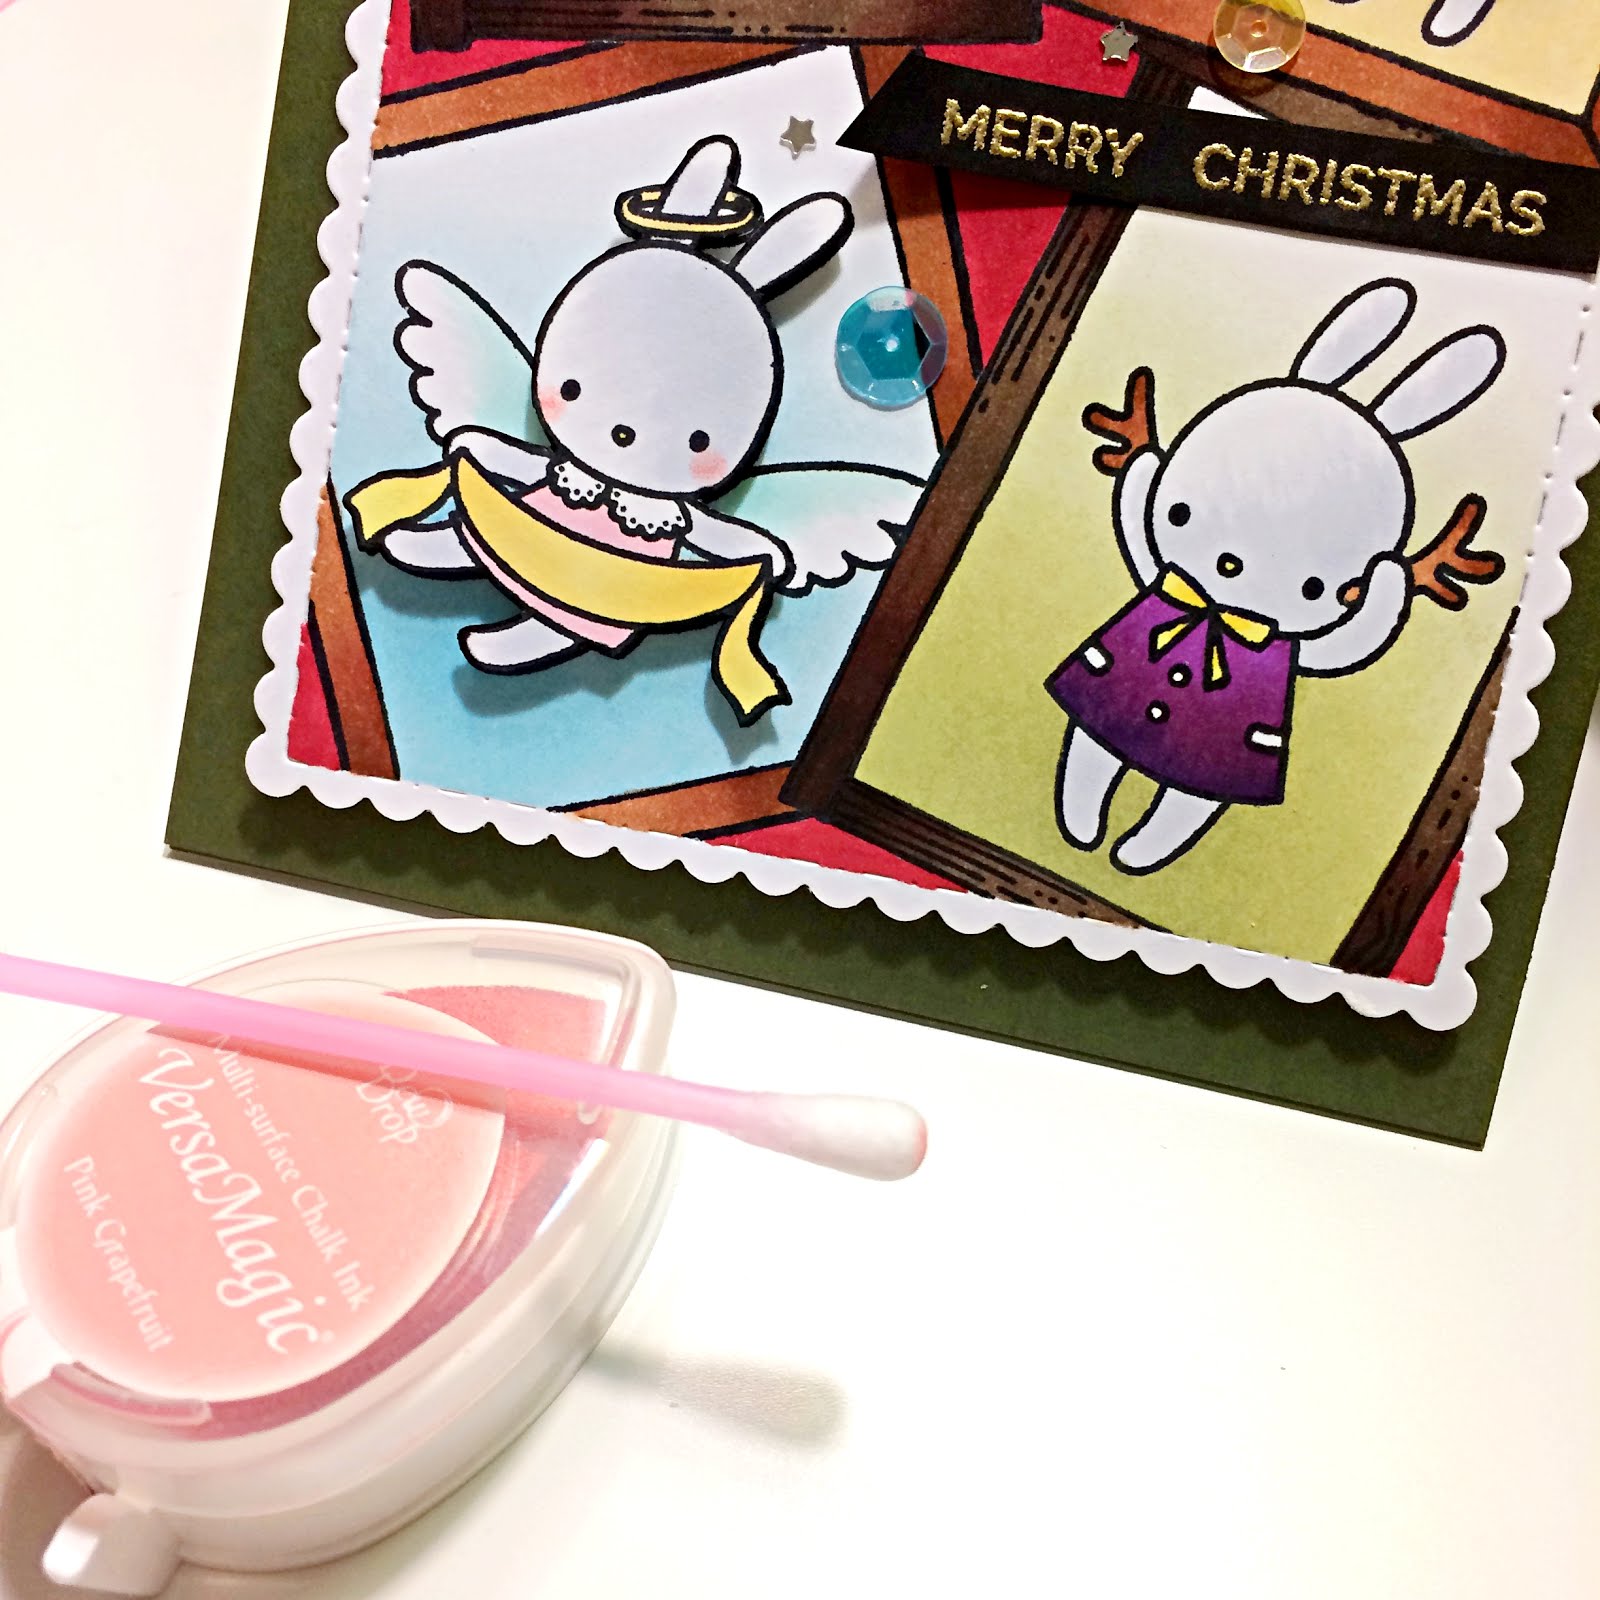
Christmas Collage ft. Mama Elephant

I am super excited to share my first entry to Ksenija's Chasing Mojo Challenge.

 
I was inspired by Margarita's adorable card. (view it on her blog here) I loved her idea of framing cute critters (it's brilliant and oh-so-fun!) and the soft look of the blended backgrounds. Also CASEd her black sentiment and her use of small embellishments.

The bunnies are from Mama Elephant's Pix's Happy Holiday set, while the frames are from Winnie & Walter's Framed with Evelin T Designs set. I colored all the images with Copic Sketch marker, and all the colors I've used are listed below:
Top Left Bunny: BG10, BG15, BG09 (scarf) RV09, RV19 (Coat)
Top Right Bunny: R27, R38, E09 (bag) YG03, G07 (clothes) Y11, Y13, Y15 (ribbon)
Bottom Left Bunny: Y02, Y21 (banner) RV11 (dress) BG10 (wings)
Bottom Right Bunny: V04, V06, V09 (dress) E33, E15 (antlers)
All bunnies used C1 and C3 for shading
Square Frame: E33, E15, E37
Retangular Frame: E44, E29, E49


Then I masked each frame and image one by one and sponged some distress ink to create the soft background. (Yellow: Scattered Straw. Pink: Spun Sugar. Blue: Tumbled Glass. Green: Shabby Shutters.)


Next I added blush to my bunnies by dabbing on some pigment ink with a Q-tip. I think it really makes a difference!


To finish off the card, I applied some glossy accent and adhered some sequins to embellish the card. I really enjoy mixing stamps from different stamps sets and companies, and had a lot of fun creating this card. I hope you have enjoyed looking at it, too! Have a wonderful day! 

Challenges Entered: 

Winnie & Walter 3rd Birthday Bash: Three Challenge (I used 3 stamp sets: Framed with Evelin T Designs, ME's Pix's Happy Holiday, MFT's Essential Sentiments. I've also adhered 3 cupped sequins and 3 star sequins.) / Sequin Challenge / Bright Colors Challenge / Mood Board Challenge (Inspired by the bright colors) / Cute Critter Challenge / Ink Blending Challenge


January 22, 2017

Winter Angel Card ft. Neat & Tangled


EDIT: Top 3 at MarkerPop

It's hard to believe that we celebrated Christmas just a month ago, and here I am creating my first Christmas card of 2017! I guess it's never too early to start making Christmas cards. ;) I started by stamping and heat embossing the faceted background stamp with WOW White Pearl embossing powder. Then I colored the triangles with different shades of yellow. The Copic colors I used are: YR23, YR21, Y11, Y13, Y15, YR14.

I don't have a star die (but should really get one) so I simply printed out a star, cut it out and then traced it on the faceted background. I then cut out a slightly larger star on white cardstock and added a black border. 


The stamp set I'm using today is Little Angel from Neat & Tangled. I colored her with Copics, and the colors I've used are listed below: 
Dress: BG10, BG15   Wings: B01
Hair: Y11, Y21   Face: YR00, R02   Blush: RV11
I've also drawn some snowflakes on her dress with a white gel pen and embellished it with small white pearls.
I wanted to make her wings shimmery and translucent, so I stamped them on vellum, flipped it to the back (because my black ink was barely drying on vellum) and colored with B01 and wink of stella shimmer pen. Then I realized that if I had just adhered the wings on top of the star, the yellow triangles would be peeking through. So I ended up adhering a pair of white wings beneath the shimmering vellum wings. It was definitely more complicated and time consuming than what I've expected, but I really love how it turned out.


I die cut a bunch of white snowflakes with Lawn Fawn's Stitched Snowflakes dies and adhered them to my card front. I think this white on white technique adds quite a bit of interest to the background, but at the same time does not distract too much from the focal point. Then I die cut a gold glitter frame using Craftin Desert Diva's Fancy Frames die, mounted it on foam tape and adhered it to the card front as well.


When I was creating the background, I forgot to leave some white, even space to stamp my sentiment. But I thought the unevenness would look quite interesting anyways. So I stamped it like how I normally would and filled in the gaps with a black pen. To finish off the card, I added a good amount of sequins and small rhinestones to embellish the card. This is definitely a card with lots of details and it took me a couple hours to create it from start to finish. I really like how it turned out, and I hope you have enjoyed looking at it, too! Thanks so much for stopping by! 

Challenges Entered: 

December 24, 2016

Glittery Christmas Tree Gift Box ft. Hero Arts


EDIT: Top 3 at a2z Scrapbooking

I've wanted to make my own gift boxes for a long time, and guess what came in the mail yesterday? We R Memory Keeper's 1-2-3 Punch Board! It's a product that has been around for a long time, I wonder what took me so long to finally purchase it. (Probably my long crafty wish list, haha!) Anyways, I was super excited to play with it and I made this 4x4x4 gift box right away. 


What is better than a handmade gift box? A decorated one, of course! I'm in love with this Merry Christmas Tree stamp and die set from Hero Arts. It's an oldie but goodie. 

The decoration is heavily inspired by Paper Sweeties's challenge graphic. I went with the color scheme, the sparkly element, and of course, the tree itself. 

I created the sparkly turquoise tree by covering an adhesive-backed cardstock with Elizabeth Crafts's Microfine Glitter. After burnishing the glitter with a bone folder and wiping off the loose glitter with a swiffer cloth, I colored it with BG15 and BG09 Copic markers. I've also embellished it with some sequins, beads, pearls, gemstones, as well as some stamped die cuts. TIP: I colored my gemstones with a red Copic marker. They were originally clear!

I also created a bow with my Bow-It-All 2.0 tool. Since I haven't put the actual gift inside the box yet, I left the ends of the bow untied. 


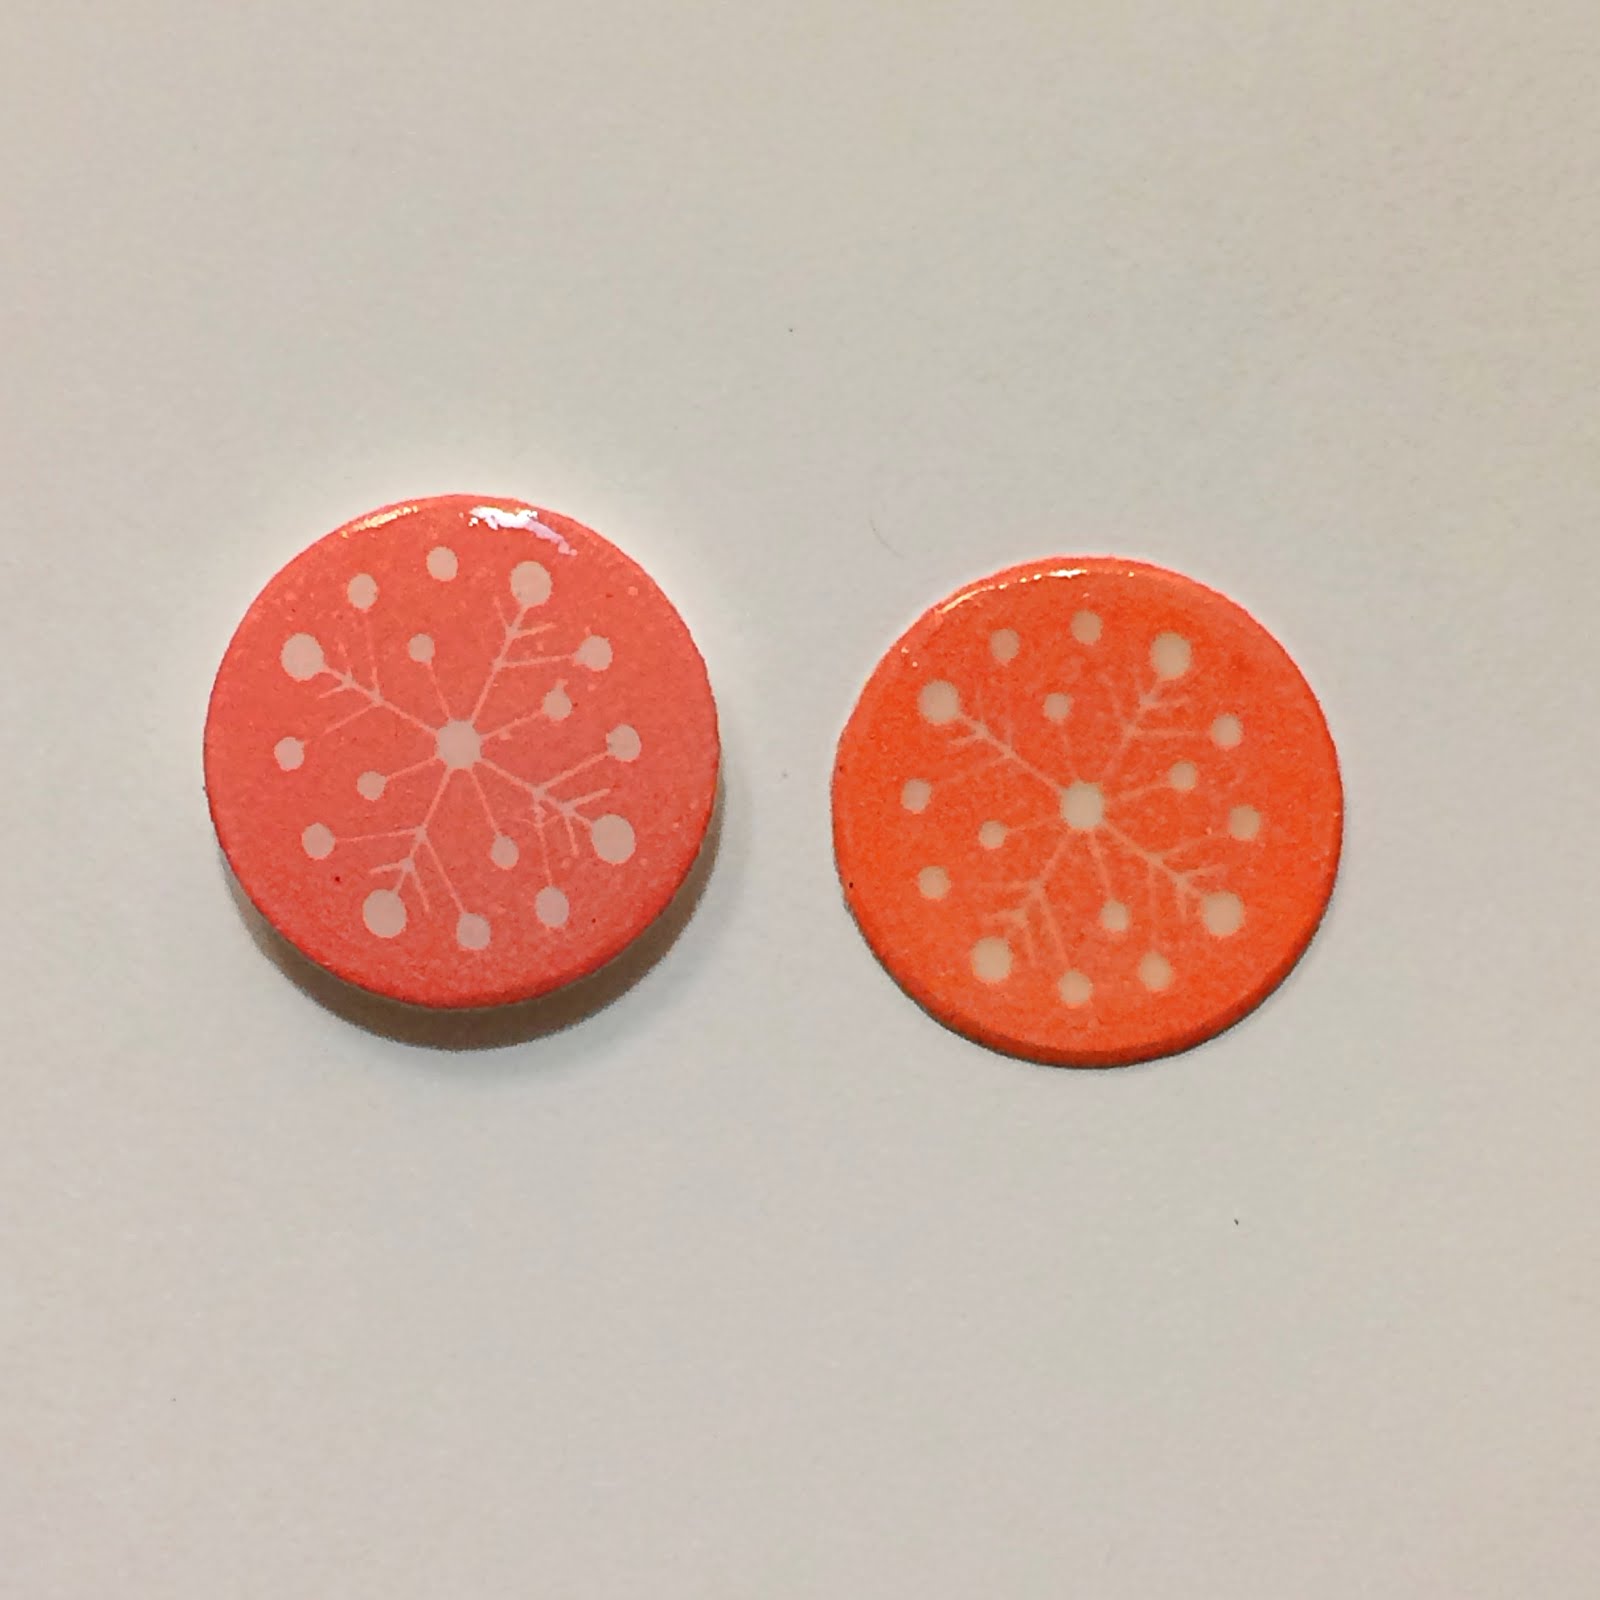
To make the stamped die cuts look more like embellishments, I've covered them with glossy accent. A trial and error: I first stamped my images with pigment inks and heat embossed them with clear embossing powder. However, heat embossing turns the white spaces yellow and also blurs the details. (right image) Adding glossy accents solves the problems! (left image)


I hope this gift box has made the present extra special, and I hope you have enjoyed looking at my sparkly creation! Thanks so much for stopping by, and have a Merry Christmas eve!

Challenges Entered:

November 30, 2016

Embellished Christmas Tree ft. Hero Arts


EDIT: Top 3 at a2zScrapbook

Since it's finals week next week, I didn't make many cards during the holidays except for the ones I guest designed for. However I really wanted to enter a2z Scrapbook's challenge because this month's theme is "Embellish it", and I love adding embellishments to my cards. I decided to make the embellishments the focal point so I picked Hero Art's Merry Christmas Tree stamp and die set. 


I used a good amount of pearls, gems, sequins and stamped die cuts to decorate this christmas tree. The gems are originally clear (like the ones on the right side of the photo), but I colored some with my Copic marker (R37 Carmine) to match the red color scheme.


I also added a coat of glossy accent to all of the stamped die cuts so they would look like embellishments, too. Then I mounted them on foam squares and adhered them to the tree. 


I also embossed the white card base for some additional interest. It looks more dimensional in real life, I just can't capture the details in the photos. 

I just received the SHOTBOX today and this is the first card I photographed inside this light box. To be honest I'm a little disappointed with the results; the lighting environment isn't what I've expected and I still have to tweak the photos afterwards. I think the lights is a little too sharp and cool and I was looking for the effect of warm, natural light. Maybe I just need to practice using it more and figure out the right way...If you have any experience with light boxes or would like to share how you photograph your projects, please comment below. I would really appreciate it! And thanks so much for stopping by!

Challenges Entered:

a2z Scrapbook: Embellish It / SSS Wednesday: ATG / SSS Monday: O' Christmas Tree

MFT Color Challenge #58
Powered by Blogger.