Showing posts with label Hero Arts. Show all posts

December 24, 2016

Glittery Christmas Tree Gift Box ft. Hero Arts


EDIT: Top 3 at a2z Scrapbooking

I've wanted to make my own gift boxes for a long time, and guess what came in the mail yesterday? We R Memory Keeper's 1-2-3 Punch Board! It's a product that has been around for a long time, I wonder what took me so long to finally purchase it. (Probably my long crafty wish list, haha!) Anyways, I was super excited to play with it and I made this 4x4x4 gift box right away. 


What is better than a handmade gift box? A decorated one, of course! I'm in love with this Merry Christmas Tree stamp and die set from Hero Arts. It's an oldie but goodie. 

The decoration is heavily inspired by Paper Sweeties's challenge graphic. I went with the color scheme, the sparkly element, and of course, the tree itself. 

I created the sparkly turquoise tree by covering an adhesive-backed cardstock with Elizabeth Crafts's Microfine Glitter. After burnishing the glitter with a bone folder and wiping off the loose glitter with a swiffer cloth, I colored it with BG15 and BG09 Copic markers. I've also embellished it with some sequins, beads, pearls, gemstones, as well as some stamped die cuts. TIP: I colored my gemstones with a red Copic marker. They were originally clear!

I also created a bow with my Bow-It-All 2.0 tool. Since I haven't put the actual gift inside the box yet, I left the ends of the bow untied. 
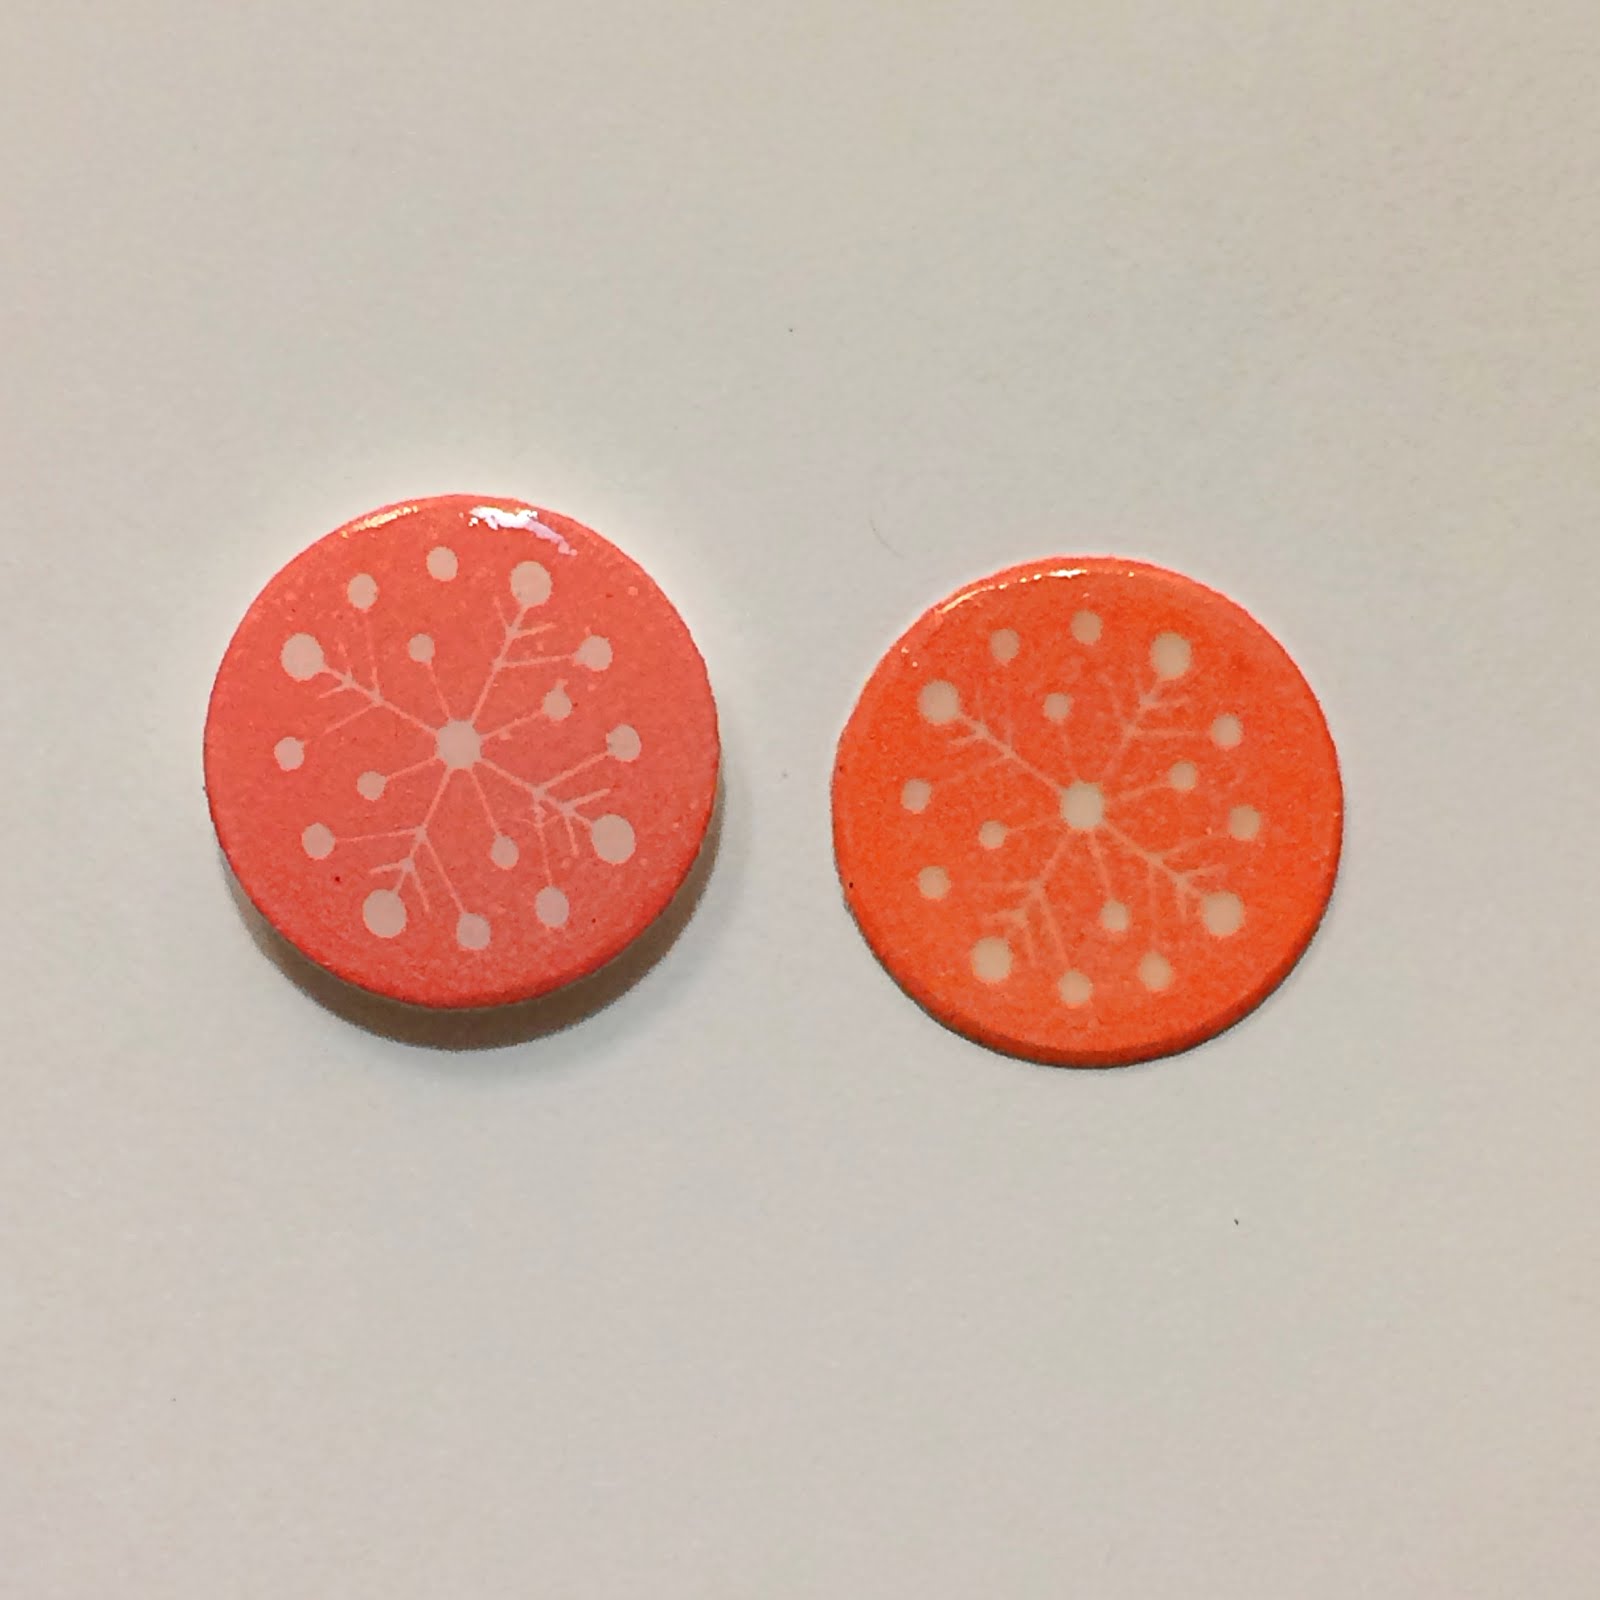

To make the stamped die cuts look more like embellishments, I've covered them with glossy accent. A trial and error: I first stamped my images with pigment inks and heat embossed them with clear embossing powder. However, heat embossing turns the white spaces yellow and also blurs the details. (right image) Adding glossy accents solves the problems! (left image)


I hope this gift box has made the present extra special, and I hope you have enjoyed looking at my sparkly creation! Thanks so much for stopping by, and have a Merry Christmas eve!

Challenges Entered:

November 30, 2016

Embellished Christmas Tree ft. Hero Arts


EDIT: Top 3 at a2zScrapbook

Since it's finals week next week, I didn't make many cards during the holidays except for the ones I guest designed for. However I really wanted to enter a2z Scrapbook's challenge because this month's theme is "Embellish it", and I love adding embellishments to my cards. I decided to make the embellishments the focal point so I picked Hero Art's Merry Christmas Tree stamp and die set. 


I used a good amount of pearls, gems, sequins and stamped die cuts to decorate this christmas tree. The gems are originally clear (like the ones on the right side of the photo), but I colored some with my Copic marker (R37 Carmine) to match the red color scheme.


I also added a coat of glossy accent to all of the stamped die cuts so they would look like embellishments, too. Then I mounted them on foam squares and adhered them to the tree. 


I also embossed the white card base for some additional interest. It looks more dimensional in real life, I just can't capture the details in the photos. 

I just received the SHOTBOX today and this is the first card I photographed inside this light box. To be honest I'm a little disappointed with the results; the lighting environment isn't what I've expected and I still have to tweak the photos afterwards. I think the lights is a little too sharp and cool and I was looking for the effect of warm, natural light. Maybe I just need to practice using it more and figure out the right way...If you have any experience with light boxes or would like to share how you photograph your projects, please comment below. I would really appreciate it! And thanks so much for stopping by!

Challenges Entered:

a2z Scrapbook: Embellish It / SSS Wednesday: ATG / SSS Monday: O' Christmas Tree

MFT Color Challenge #58

October 9, 2016

Geometric Thank You Card (Building a Background with Sentiment Stamps)


EDIT: Winner of W&W WCMD 2016

Today's card is CASEing a great card I saw in blogland, but I don't quite remember where it is from... :( I was also inspired by Winnie & Walter's challenge to stretch your stamps and dies, and that's what this card is all about!


I decided to use the sentiments in this Hero Art's stamp set to build a background. (Love this set, so very versatile!) I lined up a couple of the sentiments in my mini Misti and stamped with a light gray Hero Arts shadow ink. Then I shifted the card up a bit and repeated the stamping. 
Even with the Misti stamping tool, I find it a little challenging to get a perfectly stamped background. You might notice that I didn't get even ink coverage on my first try (pictured above). Some words are lighter and some words are darker; and double stamping only made things worse. Well practice makes perfect, and cardmaking is no exception!


Here is where I stretched the use of my dies: I have both the big and small sets of stitched square dies from Lawn Fawn, and here I've picked one from each set. As you can see, they nested perfectly! You can get stitched square frames instead of just stitched squares by using this technique. 


I originally wanted to use the corresponding "thanks" die from this Hero Arts stamp set, but it turned out to be a little too small and I just felt like the ratio wasn't quite right. So I turned to this die from Paper Smooches instead. I finished the sentiment by stamping "you are the best" in black ink. I hope this card has inspired you to stretch the use of your stamp supplies, too! Thanks for stopping by, and have a nice day!
Powered by Blogger.